4 posts tagged with "gmail"

View All Tags

Top 3 tips on how to increase email deliverability with Gmail and Google Domains
Go Mail Merge

Go Mail Merge

The best Mail Merge add-on for Google Workspace

Picture this scenario: You've spent hours crafting an email template in HTML. You modified your and your partners logos for multiple dimensions. You've added all of your other branding content such as trademark text. You've add links to your Youtube videos, your landing page, and you even added Google Analytics UTM parameters. Finally, you send your email newsletter to your 800 subscribers and all you hear are crickets... no link clicks, no Youtube video views, nothing... hmm what could have went wrong?

A few hours go by and you reach out to a friend who is subscribed and he tells you he never received the email and a short time later he checks his spam folder and, lo and behold there is your email sitting nice and pretty.


Today we'll go over a few tips to increase your email deliverability rate.#

1. SPF authenticate your DNS server#

Sender Policy Framework (SPF) is an email authentication method that specifies the mail servers authorized to send email for your domain. SPF helps protect your domain from spoofing, and helps ensure that your messages are delivered correctly. Mail servers that get mail from your domain use SPF to verify that messages that appear to come from your domain actually are from your domain.

How to protect yourself from spoofing with an SPF DNS record:

  1. Navigate to https://domains.google.com

  2. Select the Manage button next to the domain you're sending emails from

    manage domain

  3. Select the DNS menu button on the left
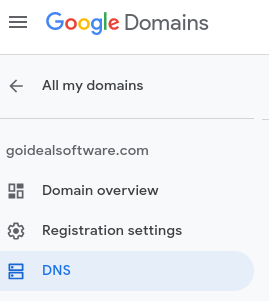
    dns menu item

  4. Scroll down to the Custom Resource Records section, here is where we will add our SPF record.

    custom resource records

  5. Enter the following values just like you see in the image below and click the add button on the right

    input new DNS record

  6. Thats all there is to it! It will take anywhere from a few minutes until a day to propagate but most likely it will take less than an hour. Be sure to check out Mail Tester in order to test your SPF record validity.

2. DKIM signature#

Use the DomainKeys Identified Mail (DKIM) standard to help prevent spoofing on outgoing messages sent from your domain.

Email spoofing is when email content is changed to make the message appear from someone or somewhere other than the actual source. Spoofing is a common unauthorized use of email, so some email servers require DKIM to prevent email spoofing.

DKIM adds an encrypted signature to the header of all outgoing messages. Email servers that get signed messages use DKIM to decrypt the message header, and verify the message was not changed after it was sent.

Steps to setup DKIM within Google Domains#

  1. Navigate to this link and select the domain that you send emails from and it should look something like this:
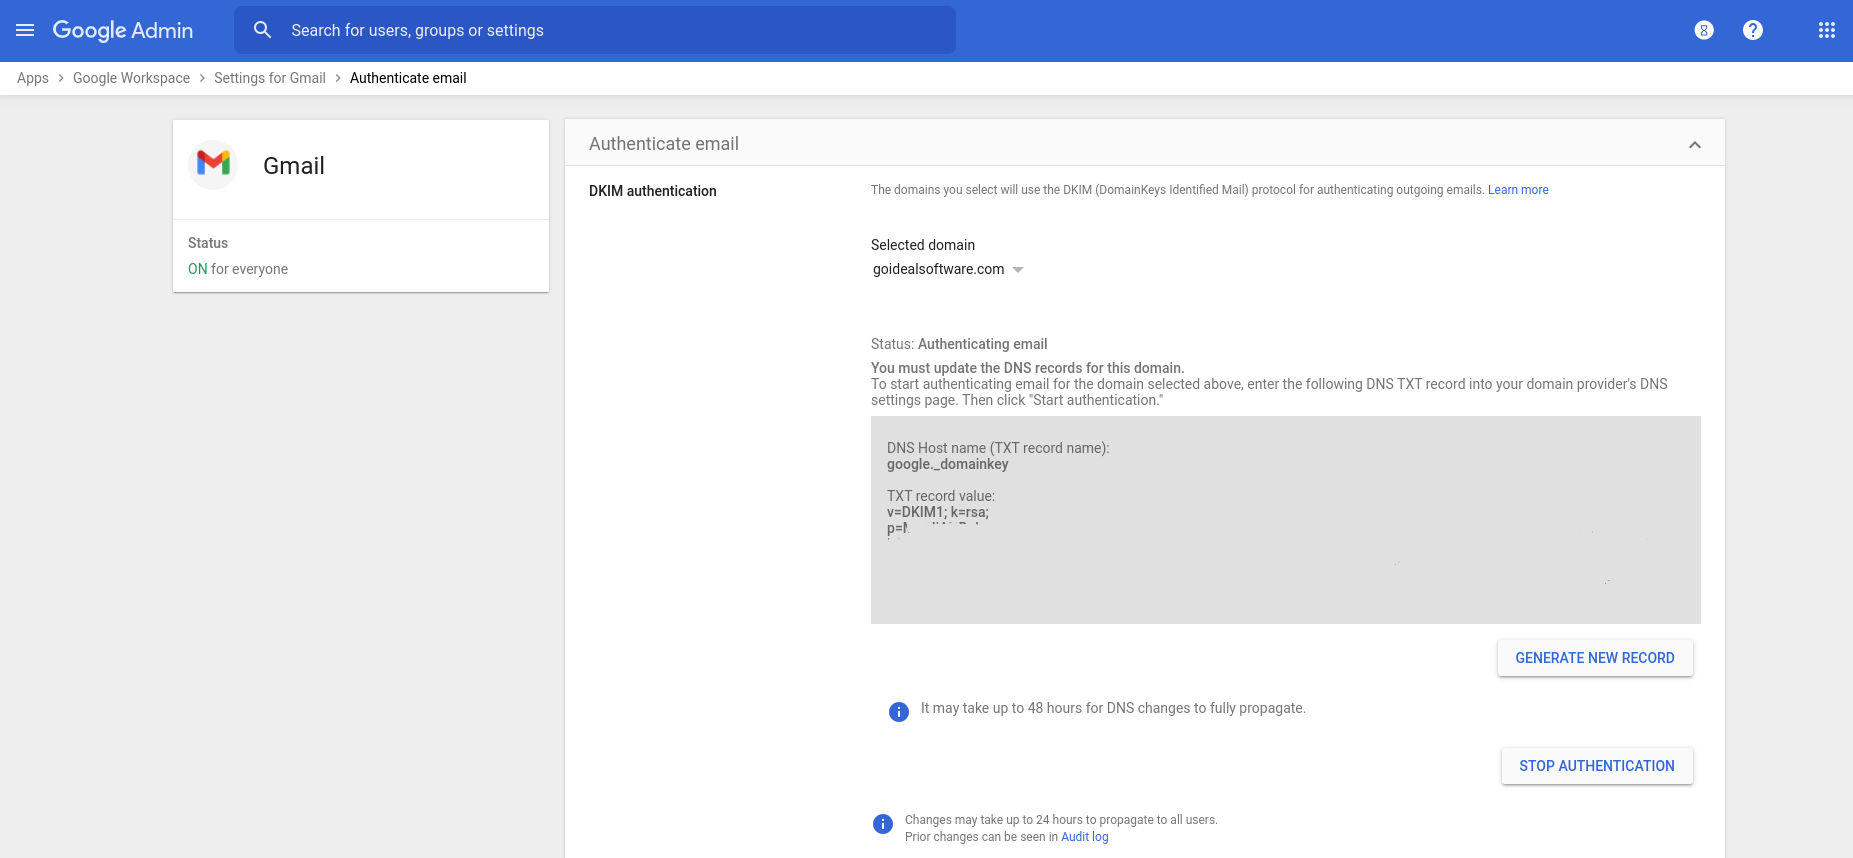
    generate a new DKIM key

  2. Once you have your respective domain selected click the GENERATE NEW RECORD button.

  3. Once the new DKIM key is generated, open up a new browser tab and navigate to your Google Domains and select the DNS menu button on the left like we did for the SPF Record.

  4. Scroll down to the Custom Resource Records section and select the TXT option from the drop down.

  5. Copy and paste the DKIM TXT record value: that we generated in the Google Admin tab and insert the DKIM value inside the new text box record.

  6. Now the most important part before clicking the Add button, you need to replace the first text box which has an @ symbol and you need to replace it with: google._domainkey in order for the verification to go through.

  7. The end result should look something like this:

    DKIM record dns

  8. After completing this process, be sure to go back to the Gmail Authentication URL in order to click the START AUTHENTICATION button note it will probably take at least 15 minutes for the changes to propagate

3. DMARC#

A DMARC policy tells receiving servers what action to take on unauthenticated messages they get from your domain. The action to take is specified with the policy (p) tag when you define your DMARC record.

example DMARC record: v=DMARC1; p=reject; rua=mailto:postmaster@solarmora.com

  1. Navigate to your domains DNS settings just like we did for our SPF and DKIM records.

  2. Add a new TXT record with following name and value:

    name = _dmarc
    value = v=DMARC1; p=none; rua=mailto:YOUR_MAIN_EMAIL_ADDRESS@YOURDOMAIN.com

  3. Finally, your new DMARC dns record should look something like this:

    DMARC record dns

Thanks for reading, be sure to checkout our other posts for more information!

Why you should warm up an email account before sending cold emails

Go Mail Merge

Go Mail Merge

The best Mail Merge add-on for Google Workspace

Let's say you have a friend named Sarah and she's been making candles for your friends and family for the past 10 years and everyone has recommended that she should sell them because they smell and look amazing!

First she creates a website with a brand new domain and as she begins sending emails to potential customers you notice nobody is replying...

What is a cold email account?#

A cold email account is a brand new email address that has been lightly used or not used at all and belongs to a relatively new or brand new domain.

For example, in our theoretical scenario above where a candlemaker would like to sell their candles online most of their emails will probably end up in a spam folder if they contain any sort of marketing content in them as most email providers have many protections in place to protect their customers from spammers.

In general 2 requirements must exist for an email address to be considered cold.

  1. The email address must be less than 1 month old and has sent less than a few hundred "high-quality" emails

    1. The email recipients should mark the email as non-spam
    2. The recipients should generally reply to the email as that is how most natural email conversations work
  2. The domain that the email address belongs to must be relatively new as well, generally less than a month old

A domain that has a lot of Domain Authority can get away with creating multiple new email accounts without any penalty.

Generally Domain Authority is based on longevity and reputation, the longer a domain has been around and the higher quality the emails that have been sent from the domains current email addresses then it is more than likely that any new emails addresses from the domain are valid as well.

How to "warm up" a cold email account#

There are a few key steps to warming up a brand new email account before sending out any cold emails.

The best general strategy for warming up a fresh email is to use it as you use your normal email address for work or personal use. For example, simply have normal back-to-back conversations with the people that you normally email with your new address and do this for a couple of weeks.

a quick yet tedious hack would be to send emails back and forth between your new email and one of your old well established emails with full body messages that are very realistically conversation like.

If manual emailing over a 2-3 week period seems daunting then there are a few paid services out there that can handle this process for you i.e. warmupinbox

whichever methodology you move forward with just know that either way a brand new Email belonging to a Fresh domain will require a 2-3 week waiting period before you should begin sending out cold emails.

How to send emails with an alias in Gmail

Go Mail Merge

Go Mail Merge

The best Mail Merge add-on for Google Workspace

What is a Gmail alias and why you should use them#

What is a Gmail Alias?#

Gmail aliases enable you to send and reply to emails from one "main" Gmail account on behalf of an "Alias" account that is assigned from Google Workspace.

For example, here at Go Mail Merge we take advantage of Gmail's Alias feature by being to send emails from our support, privacy, and sales accounts all from the same Gmail account.

How to setup your Gmail Aliases#

  1. Open up Gmail then click on the settings gear icon then select see all settings

    Gmail settings icon

  2. Select the "Accounts" tab at the top of the settings bar

    Gmail Account Icon

  3. Click the "Add another email address" Link

    Gmail add another email address

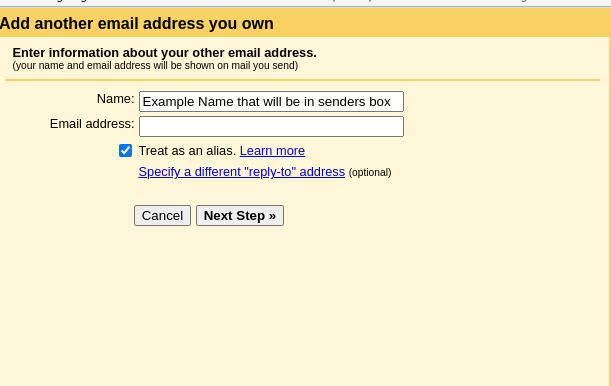
  4. Finally enter your other Google Workspace email address that is part of your domain

    Gmail add email address pop up

And that's it! You can now both send and receive emails as an alternative Google Workspace email address which enables you to be more organized and appear more professional when working with others.

How to send bulk emails with Gmail

Go Mail Merge

Go Mail Merge

The best Mail Merge add-on for Google Workspace

Gmail supports sending 500 emails per day for a regular account and 1500 per day for a Google Workspace account. Click here to read about Gmail's quota limits #


So you found yourself with hundreds or thousands of subscribers to your newly minted newsletter and you're already overwhelmed with creating content that keeps your readers engaged

Or maybe you're an instructor with an extremely large student body and you need to ensure effective and efficient communication with your students, you need to ensure each student receives their respective documents and you can't be sitting there all day sending emails.

The question then arises... how do you distribute the newsletter effectively, affordably, and efficiently and also how do you manage your students?


Today we'll go over a few methodologies for sending bulk emails with Gmail depending on your circumstances.

1. Add all of your recipients to the "to" box in Gmail#

Albeit an extremely rudimentary strategy, it can work if your emailing requirements are a one-off scenario and all of your recipients are ok with you exposing their emails.

Gmail allows a maximum of 2000 emails to be entered in the to box which seems very attractive at first but that is a bad strategy for several reasons:

  1. You're exposing all of your recipient's emails addresses to every other recipient
  2. The odds your email will end up in their spam folders increases drastically
  3. This becomes extremely unmanageable as your email list grows
  4. You won't have any analytical data about your emails i.e. who opened your emails, which emails are valid, or whether the recipient blocked your email address.

2. There's a better way#

When the need arises to send multiple email campaigns in Gmail, manage an email list, and need to add attachments to these emails then you definitely need to take advantage of a Google Workspace add-on such as Go Mail Merge

Steps to send an email campaign with Go Mail Merge#

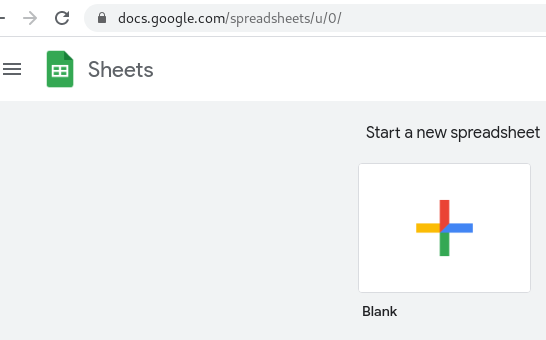
  1. Create a new Google Sheet by visiting this link and clicking the giant plus button with the label "Blank"

    how to create a new sheet

  2. Open up Go Mail Merge via the add-ons button in order to have your Spreadsheet auto-formatted for you

    how to open go mail merge

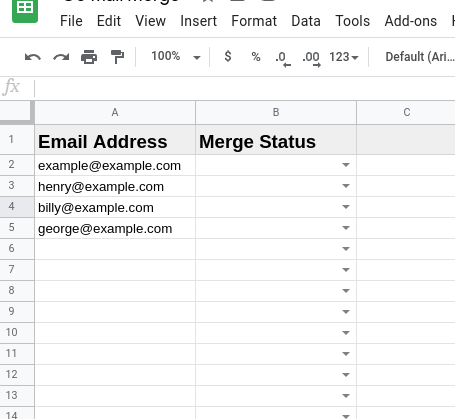
  3. Close the Go Mail Merge Manager and insert your email list in the Email Address column

    spread sheet template

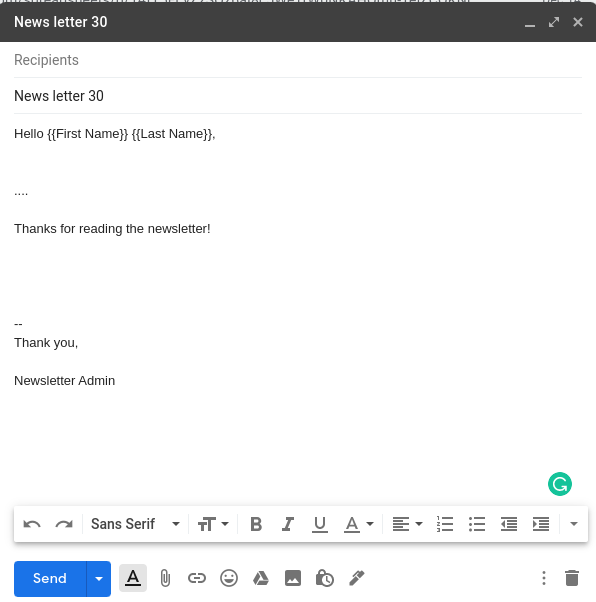
  4. Open up Gmail and create a draft email with the content of your choosing, notice the values enclosed in the {{}} will map to any columns we have added in our spreadsheet

    draft email example

  5. Go back to your respective Google Sheet and open up Go Mail Merge and select the draft email that you just created from the dropdown list in Go Mail Merge

    Go Mail Merge draft email select

  6. Click send and watch your emails be delivered in real-time

    send email campaign success

  7. Finally, open up the tracker and watch your emails' status be updated in real-time

    Go Mail Merge tracker

Start saving hours when sending emails in bulk today#

Go Mail Merge is the leading Google Workspace add-on for sending bulk email campaigns. It is the most accurate email tracker (bounces, email opens, link clicks, and responses) compared to our competitors. We also have a few exclusive features that our competitors do not have:

  1. Cancel an email campaign at any time regardless of how many emails have been sent or if none have been sent at all.

  2. Dynamic attachments from your Google Drive. Go Mail merge enables you to input a "dynamic query" in order for each recipient to receive their respective attachments example documentation here

  3. No artificial rate-limiting. Your emails will be delivered until your Gmail quota is reached and we will automatically retry to send your emails once per hour until they're all sent.

    Purchase a yearly subscription here